


Game Information
GMHBA Stadium
| fourth Quarter | |||
|---|---|---|---|
| Time | Team | Play | Score |
| 31:27 |  | M. Duncan Behind | 120 - 78 |
| 29:25 | | S. Menegola Goal | 119 - 78 |
| 27:29 |  | D. Beams Behind | 113 - 78 |
| 26:25 | | Rushed | 113 - 77 |
| 23:45 | | J. Barrett Goal | 113 - 76 |
| 22:06 | | M. Robinson Goal | 113 - 70 |
| 20:16 | | D. Menzel Goal | 113 - 64 |
| 18:30 | | T. Hawkins Goal | 107 - 64 |
| 15:57 | | E. Hipwood Goal | 101 - 64 |
| 12:51 | | D. Menzel Goal | 101 - 58 |
| 8:45 | | S. Selwood Goal | 95 - 58 |
| 6:51 | | T. Hawkins Goal | 89 - 58 |
| 3:36 | | A. Christensen Goal | 83 - 58 |
| 1:55 | | J. Henry Goal | 83 - 52 |
| 0:53 | | Rushed | 77 - 52 |
| third Quarter | |||
| Time | Team | Play | Score |
| 29:20 | | M. Robinson Behind | 77 - 51 |
| 27:35 | | N. Robertson Goal | 77 - 50 |
| 24:31 | | T. Kelly Behind | 77 - 44 |
| 18:05 | | D. Menzel Goal | 76 - 44 |
| 16:56 | | L. Fogarty Behind | 70 - 44 |
| 15:55 | | D. Beams Goal | 69 - 44 |
| 13:05 | | T. Kelly Behind | 69 - 38 |
| 11:30 | | L. Fogarty Behind | 68 - 38 |
| 8:28 | | Rushed | 67 - 38 |
| 6:01 | | T. Hawkins Goal | 67 - 37 |
| 4:09 | | T. Hawkins Behind | 61 - 37 |
| 2:42 | | T. Hawkins Goal | 60 - 37 |
| 0:57 | | C. Guthrie Goal | 54 - 37 |
| second Quarter | |||
| Time | Team | Play | Score |
| 30:39 | | T. Hawkins Goal | 48 - 37 |
| 28:50 | | S. Selwood Goal | 42 - 37 |
| 22:16 | | D. McStay Goal | 36 - 37 |
| 19:30 | | J. Henry Goal | 36 - 31 |
| 18:29 | | J. Berry Behind | 30 - 31 |
| 16:25 | | L. Taylor Goal | 30 - 30 |
| 15:00 | | O. McInerney Behind | 30 - 24 |
| 13:19 | | T. Hawkins Goal | 30 - 23 |
| 11:31 | | B. Parfitt Behind | 24 - 23 |
| 8:45 | | J. Henry Goal | 23 - 23 |
| 6:26 | | M. Duncan Behind | 17 - 23 |
| 3:56 | | D. Zorko Goal | 16 - 23 |
| 2:58 | | D. Zorko Behind | 16 - 17 |
| first Quarter | |||
| Time | Team | Play | Score |
| 26:24 | | J. Henry Behind | 16 - 16 |
| 23:36 | | J. Selwood Behind | 15 - 16 |
| 21:56 | | E. Hipwood Behind | 14 - 16 |
| 18:06 | | M. Blicavs Behind | 14 - 15 |
| 16:05 | | C. Rayner Goal | 13 - 15 |
| 14:16 | | T. Hawkins Goal | 13 - 9 |
| 12:58 | | Rushed | 7 - 9 |
| 10:56 | | B. Parfitt Behind | 7 - 8 |
| 9:14 | | D. McStay Behind | 6 - 8 |
| 6:36 | | B. Parfitt Goal | 6 - 7 |
| 3:45 | | D. McStay Goal | 0 - 7 |
| 1:52 | | Rushed | 0 - 1 |
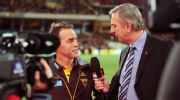
Legendary AFL commentator Dennis Cometti has died aged 76 after a battle with illness.
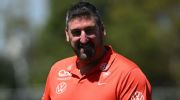
Feeling the weight of expectation, Sydney coach Dean Cox feels he's better equipped to guide the Swans back to finals.
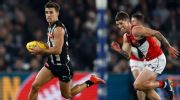
Opening Round of the AFL season gets underway Thursday evening with a blockbuster clash between Sydney and Carlton at the SCG. Here's the latest selection news and team whispers.
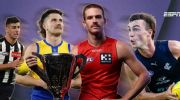
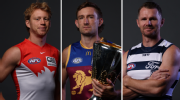
Our AFL experts are predicting the 2026 season. Who will win the premiership? Who takes home the Brownlow Medal? What are our BIG calls for 2026?
Join ESPN's footy team for some of the best AFL and AFLW analysis and insight on the ESPN Footy Podcast.
Out of the AFL's 18 teams, how many can genuinely win the 2026 premiership? Just five, writes Rohan Connolly.
| POS | Team | Pts. | % | Form |
|---|---|---|---|---|
| 1 |
 ADEL ADEL
|
72 | 139.3 | WWWWW |
| 2 |
 GEEL GEEL
|
68 | 141.5 | WWWWW |
| 3 |
 BL BL
|
66 | 114.2 | LWLWW |
| 4 |
 COLL COLL
|
64 | 122.4 | WLLLW |
| 5 |
 GWS GWS
|
64 | 115.3 | WLWWW |
| 6 |
 FRE FRE
|
64 | 109.0 | WWWLW |
| 7 |
 SUNS SUNS
|
60 | 124.9 | WWLLW |
| 8 |
 HAW HAW
|
60 | 120.9 | WLWWL |
| 9 |
 WB WB
|
56 | 137.0 | WWWWL |
| 10 |
 SYD SYD
|
48 | 97.0 | LWWLW |
| 11 |
 CARL CARL
|
36 | 96.7 | LLLWW |
| 12 |
 STK STK
|
36 | 88.5 | WWWWL |
| 13 |
 PORT PORT
|
36 | 79.8 | LLLLW |
| 14 |
 MELB MELB
|
28 | 93.3 | LWLLL |
| 15 |
 ESS ESS
|
24 | 69.5 | LLLLL |
| 16 |
 NMFC NMFC
|
22 | 76.3 | LLLWL |
| 17 |
 RICH RICH
|
20 | 66.0 | LLLLL |
| 18 |
 WCE WCE
|
4 | 60.1 | LLLLL |