Game Information
Gabba
| fourth Quarter | |||
|---|---|---|---|
| Time | Team | Play | Score |
| 29:46 |  | J. Martin Goal | 77 - 146 |
| 27:30 |  | J. Harmes Behind | 71 - 146 |
| 26:41 | | Rushed | 71 - 145 |
| 24:35 | | J. Hogan Goal | 70 - 145 |
| 22:16 | | J. Hogan Goal | 70 - 139 |
| 20:06 | | S. Day Goal | 70 - 133 |
| 17:58 | | M. Hannan Goal | 64 - 133 |
| 15:11 | | J. Melksham Goal | 64 - 127 |
| 13:43 | | J. Hogan Goal | 64 - 121 |
| 12:13 | | M. Hannan Goal | 64 - 115 |
| 10:44 | | A. Brayshaw Behind | 64 - 109 |
| 8:27 | | A. Brayshaw Goal | 64 - 108 |
| 7:01 | | C. Salem Goal | 64 - 102 |
| 5:18 | | M. Hannan Behind | 64 - 96 |
| 3:07 | | A. Young Behind | 64 - 95 |
| third Quarter | |||
| Time | Team | Play | Score |
| 33:03 | | J. Melksham Behind | 63 - 95 |
| 31:52 | | J. Harmes Behind | 63 - 94 |
| 30:21 | | C. Spargo Goal | 63 - 93 |
| 27:16 | | Rushed | 63 - 87 |
| 25:51 | | M. Hibberd Goal | 62 - 87 |
| 22:51 | | M. Hannan Behind | 62 - 81 |
| 21:29 | | A. Hall Goal | 62 - 80 |
| 19:57 | | M. Hannan Behind | 56 - 80 |
| 18:28 | | A. Young Behind | 56 - 79 |
| 16:45 | | N. Holman Goal | 55 - 79 |
| 14:58 | | J. Martin Goal | 49 - 79 |
| 10:50 | | T. McDonald Goal | 43 - 79 |
| 9:40 | | A. Neal-Bullen Behind | 43 - 73 |
| 5:04 | | M. Gawn Goal | 43 - 72 |
| 3:24 | | S. Day Goal | 43 - 66 |
| 1:59 | | A. Neal-Bullen Goal | 37 - 66 |
| 1:12 | | T. McDonald Behind | 37 - 60 |
| second Quarter | |||
| Time | Team | Play | Score |
| 32:22 | | A. Sexton Behind | 37 - 59 |
| 31:16 | | C. Salem Goal | 36 - 59 |
| 28:52 | | J. Melksham Behind | 36 - 53 |
| 24:07 | | T. McDonald Goal | 36 - 52 |
| 22:31 | | M. Hannan Goal | 36 - 46 |
| 21:04 | | C. Petracca Behind | 36 - 40 |
| 17:03 | | T. McDonald Goal | 36 - 39 |
| 15:45 | | A. Neal-Bullen Behind | 36 - 33 |
| 13:48 | | C. Ballard Behind | 36 - 32 |
| 11:58 | | A. Sexton Goal | 35 - 32 |
| 9:16 | | S. May Goal | 29 - 32 |
| 3:36 | | C. Oliver Behind | 23 - 32 |
| 2:43 | | J. Harmes Behind | 23 - 31 |
| 1:16 | | C. Spargo Behind | 23 - 30 |
| first Quarter | |||
| Time | Team | Play | Score |
| 29:47 | | T. Miller Behind | 23 - 29 |
| 28:12 | | A. Sexton Behind | 22 - 29 |
| 24:51 | | A. Neal-Bullen Goal | 21 - 29 |
| 23:51 | | J. Martin Goal | 21 - 23 |
| 20:48 | | T. McDonald Goal | 15 - 23 |
| 19:37 | | A. Brayshaw Behind | 15 - 17 |
| 19:04 | | S. Day Behind | 15 - 16 |
| 15:34 | | A. Young Goal | 14 - 16 |
| 14:19 | | S. Day Behind | 8 - 16 |
| 13:48 | | C. Salem Behind | 7 - 16 |
| 12:36 | | T. McDonald Goal | 7 - 15 |
| 10:58 | | C. Spargo Goal | 7 - 9 |
| 9:57 | | B. Ainsworth Behind | 7 - 3 |
| 5:39 | | A. Brayshaw Behind | 6 - 3 |
| 5:04 | | M. Gawn Behind | 6 - 2 |
| 3:50 | | J. Melksham Behind | 6 - 1 |
| 0:31 | | J. Martin Goal | 6 - 0 |
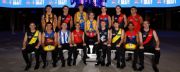
The 2025 AFL Draft has been run, but which team won? ESPN's draft expert Jasper Chellappah has cast his eye over every club and handed down a grade. Who takes out the lone A+?
The 2026 AFL fixture has been released. So, to whet your appetite for the upcoming season, we've picked out the five must-watch games from the opening month.
Who nailed their season and who's got a long summer ahead? Isadora McLeay hands out a pass or fail verdict for every AFLW team whose season is done and dusted for 2025.
The AFL Draft promised chaos and delivered in spades. With nine bids and a last-gasp live trade changing its complexion, this is the inside story of how the first round played out.
The AFL Draft offers hope to all 18 fanbases. Follow our live blog as we bring you all of the news, analysis, pick swaps, player quotes, and more from Marvel Stadium.
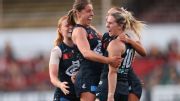
Barely three years ago, Carlton's AFLW program was at a crossroads, and things looked bleak. But the culmination of full-club investment in changing the culture has the Baggers back in a prelim, writes Sarah Burt.
| POS | Team | Pts. | % | Form |
|---|---|---|---|---|
| 1 |
 ADEL ADEL
|
72 | 139.3 | WWWWW |
| 2 |
 GEEL GEEL
|
68 | 141.5 | WWWWW |
| 3 |
 BL BL
|
66 | 114.2 | LWLWW |
| 4 |
 COLL COLL
|
64 | 122.4 | WLLLW |
| 5 |
 GWS GWS
|
64 | 115.3 | WLWWW |
| 6 |
 FRE FRE
|
64 | 109.0 | WWWLW |
| 7 |
 SUNS SUNS
|
60 | 124.9 | WWLLW |
| 8 |
 HAW HAW
|
60 | 120.9 | WLWWL |
| 9 |
 WB WB
|
56 | 137.0 | WWWWL |
| 10 |
 SYD SYD
|
48 | 97.0 | LWWLW |
| 11 |
 CARL CARL
|
36 | 96.7 | LLLWW |
| 12 |
 STK STK
|
36 | 88.5 | WWWWL |
| 13 |
 PORT PORT
|
36 | 79.8 | LLLLW |
| 14 |
 MELB MELB
|
28 | 93.3 | LWLLL |
| 15 |
 ESS ESS
|
24 | 69.5 | LLLLL |
| 16 |
 NMFC NMFC
|
22 | 76.3 | LLLWL |
| 17 |
 RICH RICH
|
20 | 66.0 | LLLLL |
| 18 |
 WCE WCE
|
4 | 60.1 | LLLLL |