


Game Information
ENGIE Stadium
| fourth Quarter | |||
|---|---|---|---|
| Time | Team | Play | Score |
| 25:57 |  | C. Curnow Behind | 138 - 45 |
| 24:13 |  | J. Cameron Behind | 138 - 44 |
| 21:08 | | J. Silvagni Goal | 137 - 44 |
| 15:10 | | T. Greene Behind | 137 - 38 |
| 11:42 | | J. Hopper Behind | 136 - 38 |
| 10:43 | | J. Kelly Behind | 135 - 38 |
| 8:38 | | A. Tomlinson Goal | 134 - 38 |
| 5:08 | | E. Curnow Goal | 128 - 38 |
| 0:26 | | B. Deledio Goal | 128 - 32 |
| third Quarter | |||
| Time | Team | Play | Score |
| 29:37 | | T. Taranto Behind | 122 - 32 |
| 28:05 | | L. Whitfield Goal | 121 - 32 |
| 25:20 | | M. McGovern Goal | 115 - 32 |
| 22:42 | | H. McKay Goal | 115 - 26 |
| 20:55 | | B. Daniels Behind | 115 - 20 |
| 18:42 | | J. Finlayson Goal | 114 - 20 |
| 16:56 | | Z. Fisher Goal | 108 - 20 |
| 12:38 | | L. Whitfield Goal | 108 - 14 |
| 8:30 | | H. Perryman Goal | 102 - 14 |
| 7:00 | | M. de Boer Behind | 96 - 14 |
| 3:59 | | J. Finlayson Goal | 95 - 14 |
| 2:40 | | C. Curnow Behind | 89 - 14 |
| 1:58 | | H. Himmelberg Behind | 89 - 13 |
| 1:05 | | B. Deledio Behind | 88 - 13 |
| second Quarter | |||
| Time | Team | Play | Score |
| 27:40 | | B. Deledio Goal | 87 - 13 |
| 26:49 | | J. Cameron Behind | 81 - 13 |
| 24:20 | | J. Finlayson Goal | 80 - 13 |
| 22:52 | | B. Deledio Goal | 74 - 13 |
| 19:53 | | Rushed | 68 - 13 |
| 16:30 | | J. Cameron Behind | 67 - 13 |
| 13:53 | | Rushed | 66 - 13 |
| 11:17 | | B. Daniels Goal | 65 - 13 |
| 8:06 | | J. Finlayson Goal | 59 - 13 |
| 6:04 | | T. Taranto Goal | 53 - 13 |
| 4:50 | | H. McKay Goal | 47 - 13 |
| first Quarter | |||
| Time | Team | Play | Score |
| 32:33 | | H. McKay Behind | 47 - 7 |
| 30:51 | | M. de Boer Behind | 47 - 6 |
| 29:21 | | L. Whitfield Behind | 46 - 6 |
| 25:56 | | H. Himmelberg Behind | 45 - 6 |
| 22:41 | | J. Cameron Behind | 44 - 6 |
| 20:54 | | A. Kennedy Goal | 43 - 6 |
| 17:53 | | H. Himmelberg Goal | 37 - 6 |
| 15:16 | | B. Daniels Goal | 31 - 6 |
| 14:03 | | L. Whitfield Goal | 25 - 6 |
| 10:38 | | H. Himmelberg Goal | 19 - 6 |
| 7:24 | | J. Finlayson Goal | 13 - 6 |
| 5:53 | | H. Himmelberg Goal | 7 - 6 |
| 4:20 | | J. Finlayson Behind | 1 - 6 |
| 2:55 | | H. McKay Goal | 0 - 6 |
With the curtain closing on another year, we've asked our ESPN experts to pull out their crystal balls to predict the future.
Ya kidding, should have been higher! Yes, it's that time of the year, when ESPN's writers vote on who Australia's biggest, best and most influential athletes are. Taking into account a number of factors, here is the top 25 for 2025.
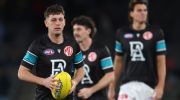
The son of AFL great Stephen Silvagni has been jailed for more than six years for raping a woman and then forging a rideshare receipt in an attempt to cover it up.
Port Adelaide gun Zak Butters insists he's not thinking about the huge free agency call looming over his 2026 season - yet.
The woman who was raped by Tom Silvagni has confronted her attacker in court, saying his evil actions had violated not only her body but also her trust.
From coach sackings to marathon tribunal hearings, retirements of stars to a wild trade and free agency period, the 2025 AFL season had it all. Here are the 20 biggest and most compelling storylines.
| POS | Team | Pts. | % | Form |
|---|---|---|---|---|
| 1 |
 ADEL ADEL
|
72 | 139.3 | WWWWW |
| 2 |
 GEEL GEEL
|
68 | 141.5 | WWWWW |
| 3 |
 BL BL
|
66 | 114.2 | LWLWW |
| 4 |
 COLL COLL
|
64 | 122.4 | WLLLW |
| 5 |
 GWS GWS
|
64 | 115.3 | WLWWW |
| 6 |
 FRE FRE
|
64 | 109.0 | WWWLW |
| 7 |
 SUNS SUNS
|
60 | 124.9 | WWLLW |
| 8 |
 HAW HAW
|
60 | 120.9 | WLWWL |
| 9 |
 WB WB
|
56 | 137.0 | WWWWL |
| 10 |
 SYD SYD
|
48 | 97.0 | LWWLW |
| 11 |
 CARL CARL
|
36 | 96.7 | LLLWW |
| 12 |
 STK STK
|
36 | 88.5 | WWWWL |
| 13 |
 PORT PORT
|
36 | 79.8 | LLLLW |
| 14 |
 MELB MELB
|
28 | 93.3 | LWLLL |
| 15 |
 ESS ESS
|
24 | 69.5 | LLLLL |
| 16 |
 NMFC NMFC
|
22 | 76.3 | LLLWL |
| 17 |
 RICH RICH
|
20 | 66.0 | LLLLL |
| 18 |
 WCE WCE
|
4 | 60.1 | LLLLL |